How to Install BMW E60 Android Head Unit?

If you have a BMW E60 or E61 with a factory 6.5″ or 8.8″ screen, you can upgrade the original screen unit with a modern looking android screen unit now. Worry about the installation? This post shows you step by step installation instructions for an aftermarket e60 android head unit.
How to install BMW E60 Android head unit?
Simply put, you will need to remove the OEM screen and radio first, disconnect plugs behind, then you can start installing the new android head unit.
Here’s a video showing you BMW E60 radio removal, and you can follow the below installation steps one by one.
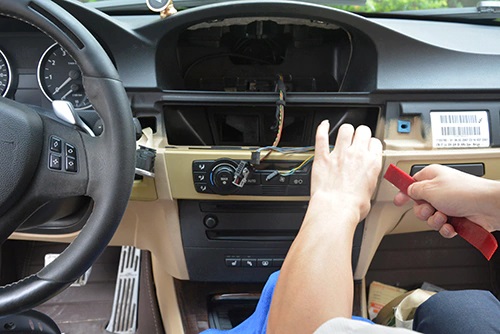
- Use a plastic level tool to pry at the end/middle/front of the decorative trim to detach the side metal chip and gently pull the trim across. The trim is held using metal clips along the length of the trim.
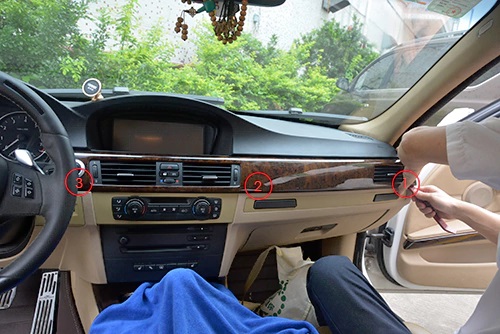
- Take out the trim including the air vents, remove the buttons for hazard light and door lock by pressing on the metal clips, detach the cable connector behind.
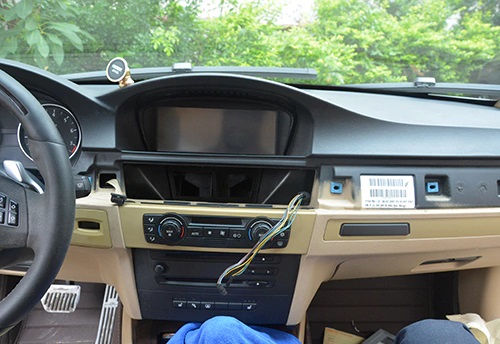
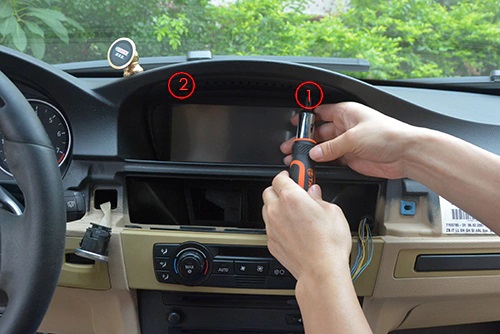
- Remove 2 screws at the top of original screen, take out the original screen unit.
- Remove the two screws at the top middle instrument panel(some models don’t have these screws), pry and pull the climate control panel towards you with force, unplug the connectors behind
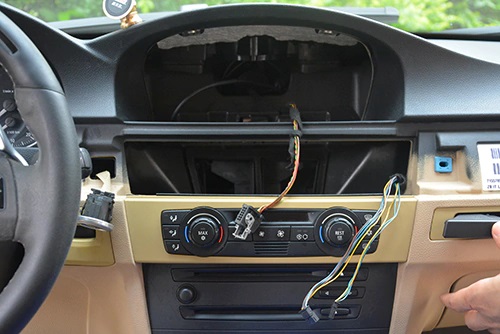
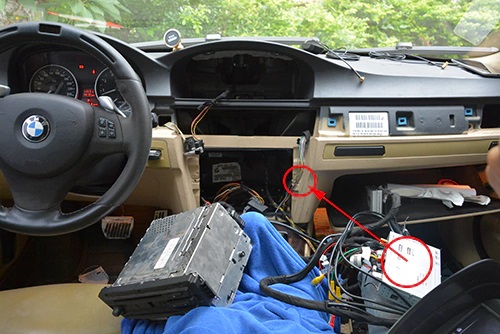
- Use the plastic tool to pry the edge of the CD panel, take out the CD panel.
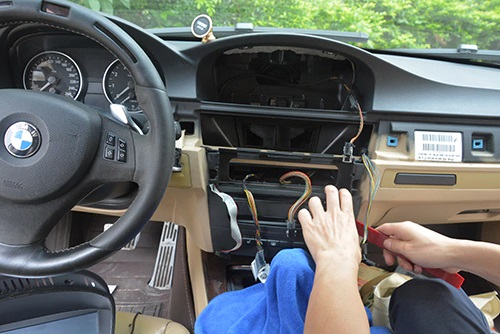
- Remove 4 screws at 1, 2, 3 and 4 to take out original CD player/radio.
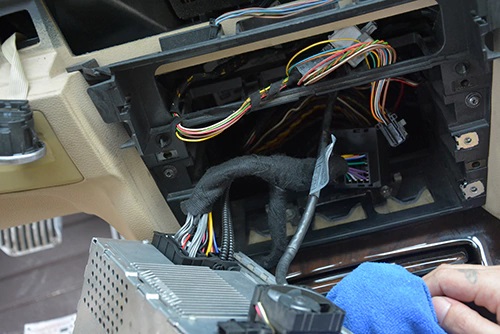
- Take out the original CD and radio unit. Detach the power plug behind the CD/radio.
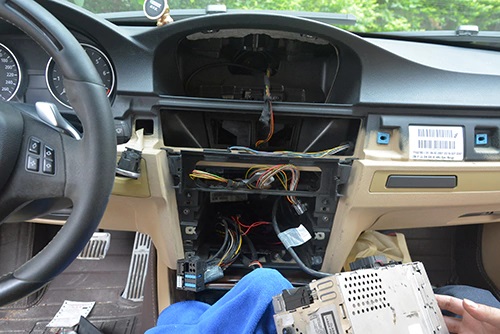
- Connect the new female power plug to the back connector of CD/radio, connect the new male plug to the original wiring harness. This step is very important, if there are fiber optic cables from original harness, you will need to move the fiber optic cables to our new plug at the same position(very important!)
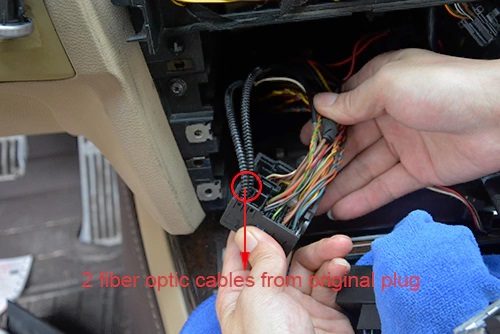
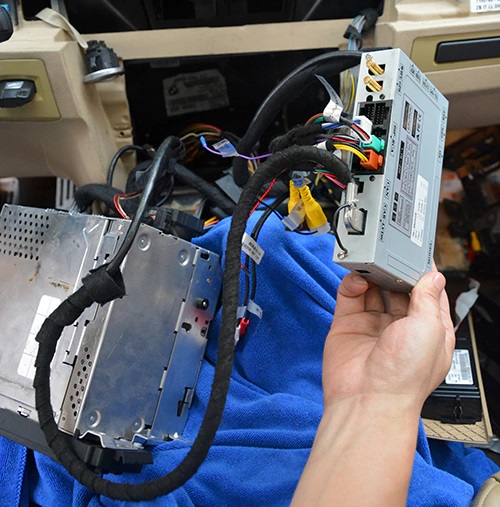
pull out the 2 fiber optic cables:
Move the 2 fiber optic cables to the new plug at the same position, make sure they are well connected!
Connect the new plug with 2 fiber optic cables to the back of factory CD/radio, see below:
- Connect the LVDS plug removed from the back of the original screen to the LVDS plug from our new main unit, connect the 2 black cables between the main unit and the new screen, connect new red, blue and green plug into the correct plugs from the side of the main unit, see picture below:
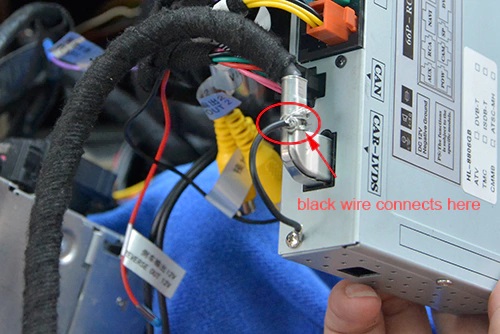
Note: You should also connect the GPS antenna, WiFi antenna at this step, GPS and WiFi antenna can be put at top right corner of dashboard. And connect the loose black wire to the iron of LVDS plug, very important!!! you should firstly connect the black wire to the iron of LVDS plug before turn on the unit! see below:
connect TFT and LVDS cables to the back of new screen.
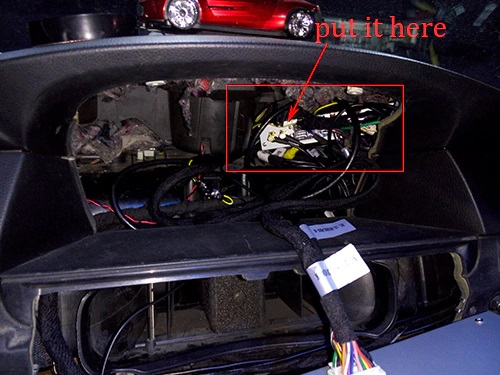
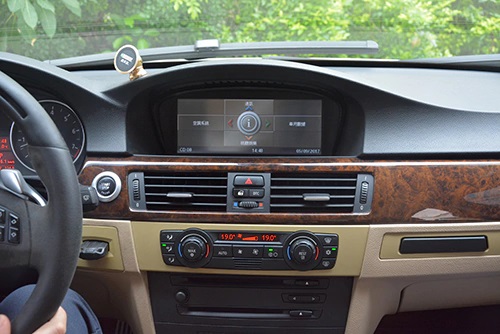
- After all cables connected well(very important!), then you can turn on the car and the unit, test it, if everything goes well, power off the car, reinstall the CD/radio and climate control panel, tug the cables at the back of the screen neatly and install the new screen, you can put the main unit at right side behind the CD/radio(remove the entire plastic frame to put it there), or you can put the unit at rear of the screen inside, or you can put the main unit to any other area where can be put into.
Don’t worry about the future maps update, you can copy new maps from USB to the sd card.
- This step is only needed by BMW e60 without factory AUX and add a small amplifier to get sound, below picture shows you how to connect the small amplifier:
Note: the small speaker is not necessary anymore, so we don’t add it in the package, as the navigation sound can come out from front left car door speaker.If there’s no sound after installed the small amplifier, the small amplifier should not be activated, you can follow these steps: firstly turn off the car and take out car key, unplug the red power plug from the main unit, then disconnect the 2 plugs for the small amplifier, then connect the 2 plugs for the small amp again, finally connect the red power plug(the red plug should be the last to plug).
- No sound after installation? You can check this post: Solution For No Sound After Installed BMW E60 Android Head Unit
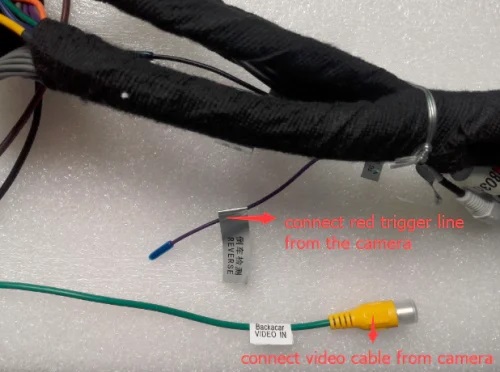
- This step is only required for installing an aftermarket rear camera.
Firstly the camera should be powered with your car reverse light.
Secondly, there are one green cable with RCA connector to connect the video input from the camera, and there’s a loose
REVERSE 倒车控制 wire which should also connect the red trigger line from the camera.
-
Only the above 2 cables need to be connected from the unit for the camera. About wiring diagram of the camera to be installed with this BMW e60 android head unit, please check this post.Note: If you have connected the backup camera correctly, but still no signal or the display is not stable, that’s because the voltage from your car reverse light is not stable, you can connect a relay to solve this, it has been proved by many of our customers, if you need more info about the relay, you can contact us we can send you some pictures and feedback from our customers who’ve used a relay for the camera.
If you have installed a few units yourself over the years, following step by step installation instructions here you won’t have a problem. Please send this installation guide to your installer before he installs the BMW E60 Android head unit for you. If your installer still have questions, you can take some pictures for us to check, we will do our best to help.
Email: info@sigmacarstereo.com
You can also download the entire installation guide here, however, installation instructions from this post are more detailed as we will update this post from time to time to add more information which our customers will frequently ask, so you’d better printing the how to install guides on this page directly.
Posted in BMW DVD/GPS Installation
Leave a Comment